基于项目需求,需要在后台系统中加入操作手册文档,用来介绍项目详细操作,基于vue-outline(一个Vue页面生成导航的小工具)加上自己优化与改进,实现了网页版文档,可以根据目录定位到具体内容,包含文档下载与返回功能。
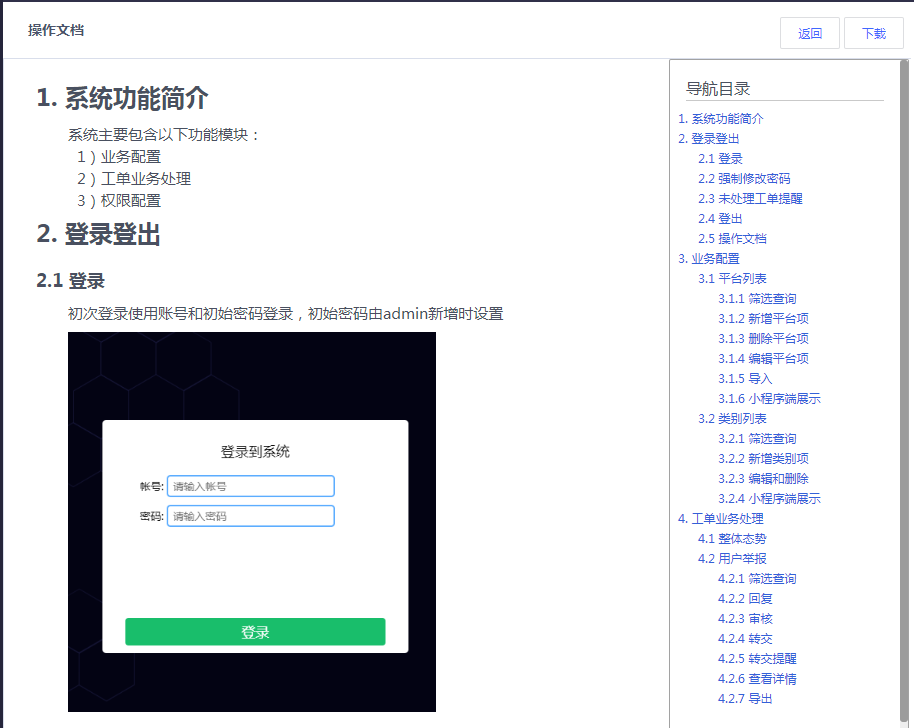
操作文档界面
代码实现
vue-outline安装
1 | npm install vue-outline |
或者
1 | yarn add vue-outline |
vue-outline引入
方法1: outline本身是一个指令插件, 你可以调用Vue.use把outline注册为全局指令(main.js):
本次使用方法1
1 | import outline from 'vue-outline' |
方法2:通过解构赋值将outline解构出来,通过Vue.directive注册为全局指令
1 | import { outline } from 'vue-outline' |
方法3:注册为组件局部指令
1 | <script> |
使用
- 整体页面代码结构
DocumentOperation.vue 封装成组件,可多系统复用
1 | <template> |
- 页面数据
documentCfg.js 主要写导航和页面所有的数据
本地图片需要使用import方式引入,使用wenpack打包时才会启动,也可以使用CDN方式引入图片,title、content、src、imgstyle、children根据文档内容选填,当没有内容时可以不写,在DocumentOperation.vue中为空时有做处理
1 | import login from '@/assets/img/document/login.png' |
注意:使用本地图片打包时webpack配置
1 | { |
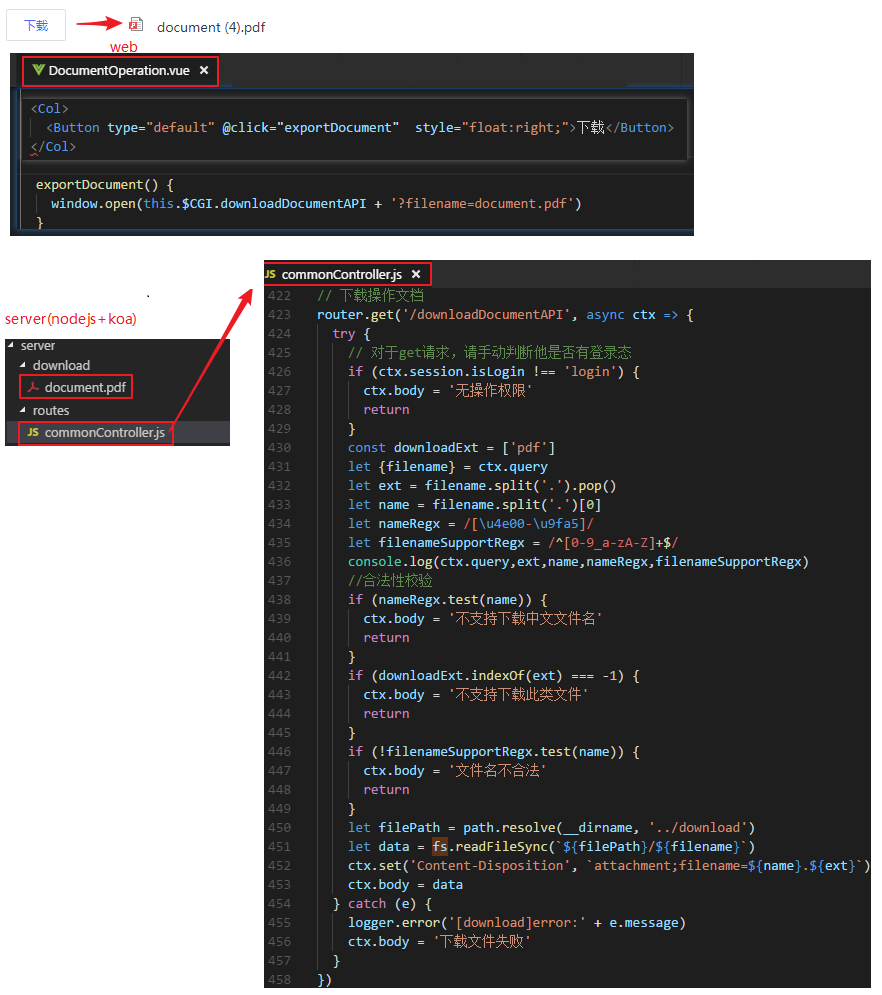
文件下载
使用jsPDF+html2canvas 导出PDF文档,文档页面不美观,用户体验效果不佳,所以使用文件下载的方式下载写好的PDF文档,存在不足的是后期改变文档内容时需要改动两个地方,这块后期需要继续进一步优化
经过一次次的研究,这个网页版的操作文档就实现好了